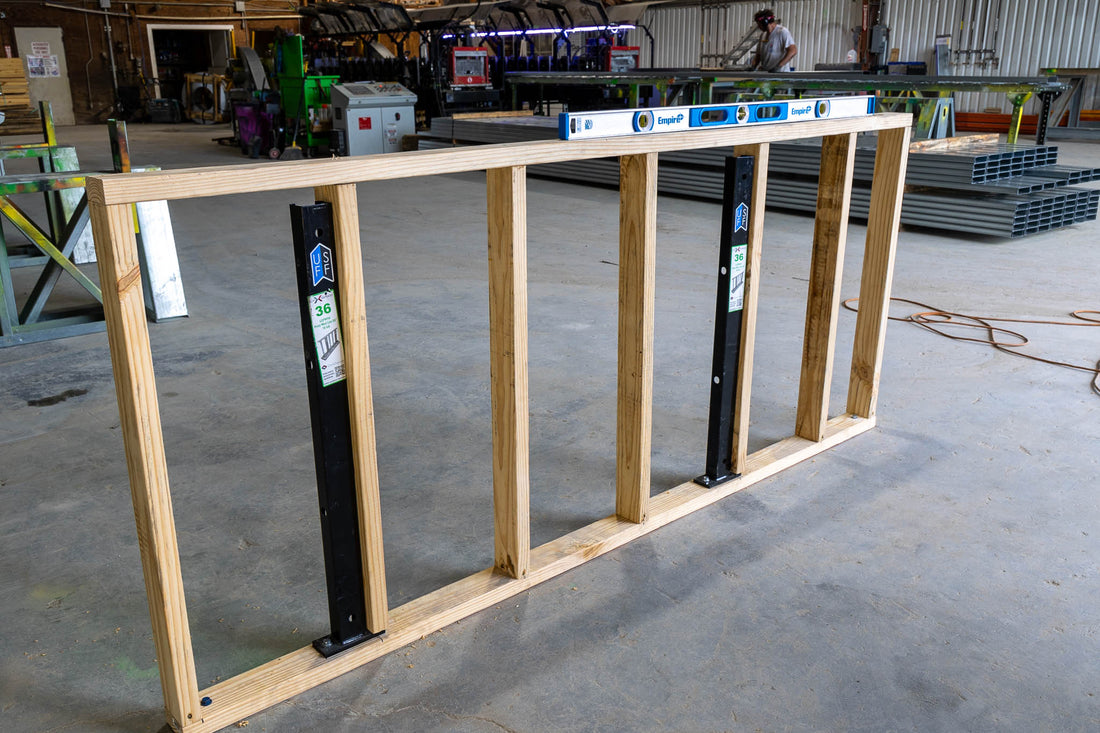
Sometimes you need a wall that isn't full height from floor to ceiling. It has nothing to hold it at the top and is susceptible to being pushed over unless braced well to the substructure (slab or floor). These walls are called pony walls, knee walls, half walls, or partial walls. They are a great way to divide a space in a home or commercial space while still allowing light and sound to travel between spaces. Because they are very weak at the top it is important to use hardware like our ClarkDietrich pony wall tool to tie down the structure. Read more in this article to learn how to build a pony wall!

If you are trying to build a pony wall with wood studs, refer to the following: How To Build a Strong Pony Wall with Metal Studs
In summary here is what it will take to build a pony wall!
- Locating the wall position and marking it
- Anchor your bottom plate
- Measure your stud positions
- Understand where you will put the pony wall supports
- Drill the plate and substructure and install the pony wall supports
- Screw the wall studs to the pony wall supports
- Install the top plate
- Finish the assembly
Installation Preparation

These tools will be helpful for the process of building a pony wall
- Clamps for keeping members straight
- Hammer drill for concrete anchors
- Impact driver for installing anchors
- Chalk box for layout
- Square or T square for corners
- 4' Level
- Tape measure
- Drill bits
You will need the following materials:
- Wood screws or nails
- Long screws for connecting to metal
- Wood anchors for the bottom plate
- Anchors for the pony wall support
- Tall enough pony wall support
- Screw down concrete anchors
After cleaning and gathering the needed tools, mark where you want to install the pony wall. Once you are satisfied with the location, run your bottom plate on the ground and anchor it in at least two spots so it doesn't move. If needed, please refer to a structural engineer to ensure you have enough pony walls and they are spaced correctly. Typically a pony wall support every 4' will be a good start, but if you aren't sure refer to a structural engineer. Next mark where you need to put studs for your sheathing and then mark where you want your pony wall supports.

Anchoring and Installing Pony Wall Support
After you have marked out where you need to put your studs, you can place the pony walls either 3/4" from the center of where a stud needs to be or you can put it between any bays formed by the stud layout. You can plan to have either one stud or two studs on each side of the pony wall support. If you are happy with the layout and it doesn't look like you will have interference, you can then proceed to install the pony wall. This is done by marking on the bottom place where the predrilled baseplate holes are. Take a wood drill bit and drill through the bottom track being careful not to damage the drill bit by hitting concrete. Once you have drilled through the bottom track, take your hammer drill and drill holes for the concrete anchors. We recommend screw down anchors like the Simpson titen anchors. Finally, screw down the pony wall supports and push against them to ensure they are well anchored.


Finishing the Assembly
You are almost done building the wooden pony wall. The last thing you need to do is finish laying out the remaining studs and install the top plate. Make sure you clamp the studs to the pony wall supports and drill through the studs in to the pony wall supports. We recommend using clamps and taking a small drill bit to predrill the metal of the pony wall support prior to driving a screw. We find that screw heads especially driller head screws tend to break easily after drilling through wood because the pressure may break the drill bit without drilling through the metal. Screw a minimum of three screws (one at the bottom, one in the middle, and one at the top) into the pony wall support. Make sure to use a square and 4' level to ensure the studs are vertical and not tilting once installed.

You can now layout the remainder of your studs and install the top plate and finish the wall. Congrats! You've now finished the pony wall and it should be strong enough for adults or kids to lean on without any risk of the wall falling over. These walls can be covered with anything and even have electrical run inside them.

Learn more about pony wall supports on ClarkDietrich's Website.

